No Hands Foot Pic Challenge Featuring Feet Finder Tips and Feet Selfie Tricks
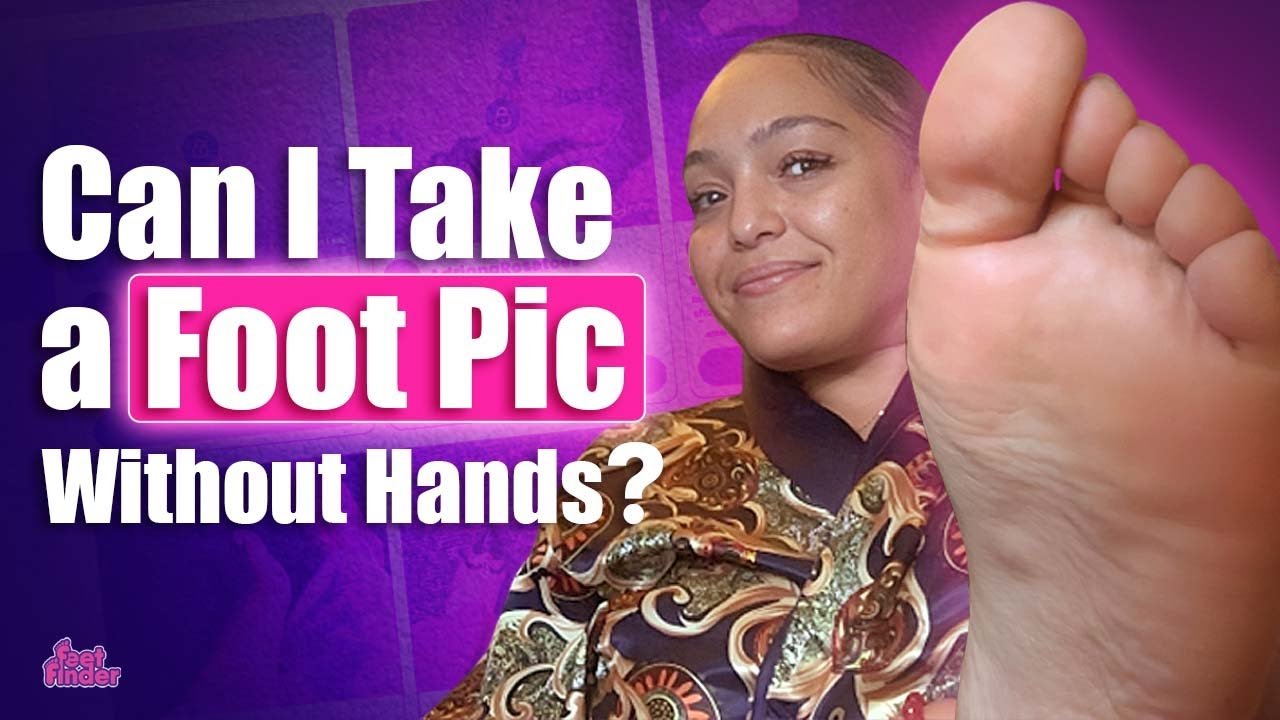
The No Hands Foot Pic Challenge blends playful stunt-work with practical tips, as nose taps, toe presses, and other silly tricks become creative ways to shoot eye-catching feet selfies while you enjoy the process. You’ll get laughs plus simple FeetFinder tips and feet selfie tricks that can help your content stand out and feel more professional.
This article outlines how to treat foot content as a structured business, covering setup, common misconceptions, startup costs, branding, content planning, platform rules, customer boundaries, and realistic income scalability. You’ll walk away with actionable feet content creator tips and a clearer view of platforms like FeetFinder and OnlyFans so you can make smarter choices for your side hustle or creator career.
No Hands Foot Pic Challenge Overview
The No Hands Foot Pic Challenge is a playful, social-media-friendly stunt where you try to photograph your own feet without using your hands to press the shutter. As a creator, you’ll find the challenge combines technical creativity with a performance element — it’s part trick, part photography exercise, and part content hook that can help you stand out in a crowded feed while showing off technique and personality.
Description of the viral No Hands Foot Pic Challenge and core objectives
In the viral version of the challenge, you attempt to trigger the camera using unconventional body parts or clever tools — nose taps, toe presses, timed shots, and remote triggers are common. The core objectives are simple: capture a clear, well-composed foot photo or short clip without physically touching your phone with your hands, entertain or surprise viewers, and demonstrate creative problem solving or dexterity.
Common variations seen on social platforms and the FeetFinder video example
You’ll see many variations across platforms: short vertical reels demonstrating a single technique, montage compilations of several methods, humorous fails, and polished tutorials that teach viewers how to replicate the trick safely. The FeetFinder-style video often blends the challenge with practical tips — a mix of attempt footage, safety comments, and follow-up ideas for monetizing or repurposing the shots on platforms like FeetFinder.
Why creators try this challenge: engagement, novelty, and content differentiation
You try this challenge because it’s intrinsically shareable and invites reactions: people love to see the unexpected, the skillful, and the funny. Novelty drives engagement — unique thumbnails, replay value, and comments asking “how did you do that?” — all of which help algorithmic reach. For foot-content creators, the challenge is a way to differentiate your portfolio and show technical range beyond standard selfies.
Safety and practicality considerations before attempting the challenge
Before you try the challenge, assess your flexibility, balance, and the risk of dropping or damaging your device. Consider comfortable positions, avoid slippery surfaces, and test methods with the phone already secured on a stand. Plan for hygiene and privacy, and avoid any poses or stunts that could strain muscles or cause injury just to get a like.
How the challenge can be repurposed into long-term content ideas
Once you’ve practiced the tricks, you can repurpose them into recurring formats: a “No-Hands Techniques” tutorial series, behind-the-scenes content showing setup and editing, before/after shots comparing hands-on versus no-hands images, or paid content collections on FeetFinder that focus on specific themes (painted toes, seasonal props, or creative angles).
Creative No-Hands Techniques and Tricks
This section explores safe, repeatable methods you can use to take foot photos without using your hands. Each technique can be adapted and rehearsed until it looks polished on camera.
Nose tap method and step-by-step safe execution
The nose tap method uses your nose to press a phone’s capture button. To do this safely, secure your phone on a stable tripod or mounted holder at a reachable angle. Practice bringing your face toward the camera slowly to tap the screen with minimal force. Use screen sensitivity settings or a stylus tip attached to a nose clip (gentle and hygienic) to reduce the effort needed. Keep your neck relaxed and avoid jerking motions that could throw off balance.
Toe press and controlled toe-trigger techniques
A toe press involves using your toes to trigger a physical remote, a Bluetooth button, or even a stylus placed against the screen. Position the device on the floor or a low mount, place your foot in the desired pose, and use one toe to depress the trigger. Practice controlled presses to avoid sudden shifts in pose. If you plan to press a touchscreen, use a clean toe tip or a soft-cap stylus to protect the screen and skin.
Voice-activated shutter and timer-based approaches
Voice-activated capture and built-in timers are the safest no-hands options. Most smartphones and camera apps support voice commands (e.g., “cheese” or custom phrases) or countdown timers you can set for several seconds. Use a longer countdown if you’re changing poses or balancing, and combine timer shots with burst mode to increase your chance of getting a sharp frame.
Using small Bluetooth foot-friendly remotes or wearable triggers
You can invest in compact Bluetooth remotes that are easy to press with a toe or strap onto the foot. There are also wearable triggers — tiny buttons that connect via Bluetooth and can be attached to ankle bands or toe loops. These allow you to maintain pose while activating the shutter without touching your phone directly, and they’re especially useful for repeatable shots when you’re creating multiple images or a gallery.
Mirror reflections, floor reflections, and creative angles to mimic no-hands shots
If the goal is the illusion of no-hands capture, reflections offer creative solutions. Position the camera low and use polished floors, mirrors, or glass surfaces to reflect a foot pose while you trigger the shutter with a remote or timer. You can also use angled mirrors to create dynamic compositions that look like candid on-the-fly shots while actually being carefully staged.
Safe Practices and Risk Minimization
Safety matters whenever you’re balancing, stretching, or using phones and props in unusual ways. Prioritize your well-being and device security over a single shot.
Physical safety: avoiding strain, slipping, or risky balances
Avoid extreme stretches or positions that put strain on joints, neck, or back. Use non-slip mats, shoes with grip for transition poses, and practice each pose slowly. Don’t attempt elevated balancing acts on unstable furniture or wet surfaces. If a pose feels uncomfortable or causes pain, stop and modify it.
Hygiene tips for close-up foot work and device cleanliness
You’ll often shoot close to bare skin, so keep your feet clean and moisturized for a polished look. Clean your phone and any remotes or styluses before contact, and use disposable covers or washables for shared props. If you use nose taps or mouth-adjacent devices, avoid sharing them and sanitize between uses.
When to use a spotter or assistant for stability
Use a spotter when trying higher-risk balances or when you need help arranging props and adjusting lighting. An assistant can protect your device, hold reflectors, and call the timer while you focus on posing. Spotters also make it easier to experiment with more dynamic poses safely.
Avoiding harmful or dangerous stunts for likes
Don’t risk injury or permanent damage to property for engagement. Dangerous stunts may get views, but they can have real consequences. Stick to rehearsed, well-supported techniques and avoid anything that compromises your safety or crosses legal or platform content rules.
Guidelines for maintaining comfort and sustainability during frequent shoots
If you shoot often, rotate poses to avoid repetitive strain, take regular breaks, and do simple stretches between sessions. Invest in ergonomic props — supports, cushions, and adjustable mounts — so you can maintain variety without overtaxing your body.

This image is property of i.ytimg.com.
Foot Selfie Composition and Posing
Composition and posing are what turn an adequate photo into a signature image. Small changes in angle or tension can dramatically improve the aesthetic.
Key compositional principles: framing, negative space, and focal point
Decide what you want to emphasize — toes, arch, sole — and frame accordingly. Use negative space to make the foot stand out, and position the focal point (like painted nails or an anklet) using the rule of thirds. Consider whether you want a tight crop or a wider scene that tells a story.
Posing tips for toes, arches, soles, and ankle lines
Relax your toes slightly to avoid a rigid look; flexing or pointing subtly changes the arch and line of the leg. Highlight the arch by extending the ankle and keeping toes lightly stretched. For soles, angle the foot so texture is visible without appearing harsh; use soft lighting to balance detail and smoothness.
Using leg, knee, and torso placement to create flattering angles
Your overall body placement affects the foot’s appearance. Slightly rotate your hip, bend the knee, or tuck the opposite leg behind to create depth and cleaner lines. If you include part of your leg, use poses that elongate — small extensions rather than full extension — to avoid foreshortening.
Choices about including face, partial anonymity, or full anonymity
Decide your level of identity exposure based on comfort and business strategy. Partial anonymity (cropped face, shadow, or masks) helps maintain privacy while allowing personality through body language. Full inclusion builds stronger personal branding but requires you to consider long-term online safety and brand implications.
Creating variety: close-ups, wider lifestyle scenes, and contextual props
Mix close-up detail shots (nails, rings, textures) with wider, lifestyle images (feet on a bedspread, beach scene) to keep your feed engaging. Props like fabrics, candles, or simple jewelry add context and mood. Rotate color palettes and thematic props to build collections that buyers can recognize.
Lighting and Background Techniques
Good light and an appropriate background can elevate an ordinary foot shot into professional-looking content.
Natural light best practices: windows, shade, and golden hour
Natural light is flattering and accessible. Use diffused window light for soft, even skin tones; shoot in open shade to avoid harsh contrast; and experiment with golden hour for warm, flattering hues. Position yourself so the light grazes the contours of the foot to emphasize shape without exaggerating texture.
Affordable artificial lighting: ring lights, softboxes, and reflectors
If you shoot indoors often, affordable tools like ring lights and small softboxes provide consistent, controllable light. Use a reflector (even a white poster board) to fill shadows. For macro detail, use a small LED panel to control highlights without washing out texture.
Reducing harsh shadows and controlling highlights on skin texture
Soften harsh shadows with diffusion — sheer fabrics, shower curtains, or dedicated diffusers work well. Lower the intensity or move the light source farther away to avoid blown highlights that flatten skin. Small adjustments like changing angle or adding fill light make a big difference.
Choosing backgrounds and surfaces that complement skin tone and props
Select backgrounds that contrast with your skin tone to make the foot pop: lighter backgrounds for darker skin tones and vice versa, though this is flexible if you want a moody or monochrome aesthetic. Textured surfaces like wood, tiles, or fabric can enhance the image’s tactile appeal.
Color coordination and using fabrics, tiles, or wood for aesthetic cohesion
Plan a palette for each shoot — coordinating nail polish, props, and backgrounds will help your gallery look cohesive. Natural textures like wood or linen often photograph well with skin tones, while tiles or patterned fabrics add visual interest for themed shoots.
Camera, Equipment and Setup
You don’t need high-end gear to produce marketable content, but the right tools and settings make your work easier and more consistent.
Smartphone camera settings: resolution, focus lock, and grid lines
Use the highest resolution available on your phone and enable focus lock to avoid accidental refocusing. Turn on grid lines to apply compositional rules, and experiment with exposure compensation to control brightness. Shoot in RAW if your device supports it for more flexibility in editing.
Tripods, adjustable phone holders, and floor-mounted rigs for no-hands shots
Invest in a sturdy tripod with a flexible arm or a floor-mounted rig that lets you position the phone low and close. Clamp mounts and adjustable phone holders let you lock angles in place, which is essential for repeating setups and for no-hands techniques.
Macro and wide-angle clip-on lenses for creative perspective
Clip-on lenses expand creative options: a macro lens captures skin texture and nail detail, while a mild wide-angle can create stylistic foreshortening. Choose lenses that maintain image quality and avoid excessive distortion.
Bluetooth remotes, foot-activated triggers, and smart home voice commands
Pair a Bluetooth remote or foot-activated trigger with your device to make no-hands capture reliable. If you use smart-home voice commands, test responsiveness and privacy settings before relying on them during a shoot.
Protective gear for devices and alternative mounts for creative angles
Protect your phone with padded cases or sandbag your tripod to prevent tipping. Use adhesive mounts, suction cups, or clamp systems to achieve low or overhead angles safely. For experimental shots, secure the device before posing to avoid drops.
Editing and Post-Processing Tricks
Edit thoughtfully to maintain authenticity while presenting polished work that fits your brand.
Basic edits: cropping, straightening, and aspect ratio choices
Start with cropping and straightening to improve composition and remove distractions. Choose aspect ratios appropriate for each platform: vertical for reels and stories, square or landscape for galleries. Keep framing consistent across a series for a cohesive look.
Color grading and skin tone adjustments for consistent branding
Develop a color grade that matches your brand’s mood and apply it across shoots to maintain a recognizable aesthetic. Be subtle with skin tone adjustments — aim for natural warmth and consistent tonality across images.
Retouching techniques that preserve natural texture while minimizing flaws
Avoid over-smoothing. Use spot healing for minor blemishes and tools that preserve pores and natural texture. The goal is polished skin, not plastic perfection — buyers often prefer realism and small authentic details.
Using presets and batch editing to maintain a consistent feed
Create or buy presets and use batch editing to process multiple images quickly. Presets save time and help create a signature look, but tweak each image individually to account for variations in lighting or color.
Recommended apps and desktop software for efficient post-processing
Use accessible mobile apps for quick edits and desktop software for deeper control. Choose tools that support RAW editing if you shoot in that format. Organize presets and maintain a simple workflow so you can produce content reliably.
FeetFinder Tips and Platform Strategy
If you plan to sell foot content, approach it like a niche business. FeetFinder and similar platforms offer features and tools to help you present, protect, and monetize your work.
Building an effective FeetFinder profile: username, bio, and profile photo tips
Choose a memorable, on-brand username that’s easy to search. Write a concise bio that says what you sell, your style, and any boundaries you have. Use a clear, tasteful profile photo that represents your aesthetic while maintaining whatever level of anonymity you prefer.
Optimizing listings with keywords like ‘feet pics’, ‘foot content creator’, and ‘feet finder’
Use descriptive keywords in titles and descriptions so buyers can find your listings. Be specific about what’s included (e.g., number of photos, themes, custom options). Accurate tagging makes it easier for customers to filter and discover your content.
Content tiering: free samples, paid galleries, custom requests, and subscriptions
Offer free samples to attract interest, curated paid galleries for passive income, and custom commissions or subscriptions for higher-value recurring revenue. Tiering helps users engage at different price points and builds trust over time.
Using platform features to protect content and manage buyers
Use built-in privacy and watermarking features to protect images and be clear about your terms before completing a sale. Keep communication on the platform when possible, follow platform rules, and document transactions to manage disputes.
Cross-promotion strategies between FeetFinder, OnlyFans, Instagram, and other platforms
Cross-promote by teasing free content on social channels and directing serious buyers to FeetFinder for secure purchases. Use consistent branding across platforms, but tailor content to each channel’s strengths: short-form videos for Instagram/TikTok, gated galleries for FeetFinder.
Selling Feet Pics as a Business
Treating foot content as a business means planning, investing, and protecting your professional life.
Reframing from quick side-hustle to structured online business
Think beyond single sales: plan content calendars, branding, customer service standards, and revenue models. Treat your work like any niche creative business, with goals, metrics, and reinvestment in gear and promotion.
Startup and recurring costs: equipment, props, marketing, and platform fees
Budget for a quality phone or camera, tripod and lighting, props and backdrops, and platform fees. Expect recurring costs like subscriptions for editing software, ad spend, and platform commissions. Track these as business expenses.
Pricing strategies: single images, bundles, subscriptions, and custom commissions
Price based on effort, exclusivity, and market research. Offer entry-level singles, mid-tier bundles, premium custom content, and subscription access. Test prices and adjust based on demand and effort required.
Delivery methods, file formats, and secure transaction practices
Deliver files in commonly used formats (JPEG, PNG, or higher-resolution files when requested). Use platform delivery systems when possible, avoid sharing unwatermarked high-res files until payment clears, and document transactions and permissions.
Record-keeping, invoicing, tax basics, and treating income professionally
Keep accurate records of income and expenses, issue invoices where appropriate, and set aside funds for taxes. Consult local tax rules about self-employment income and consider using simple accounting software to stay organized.
Conclusion
You’ve explored techniques, safety practices, composition, gear, editing, platform strategy, and business fundamentals — all aimed at helping you create safer, more profitable foot content.
Recap of core takeaways: safety-first approach, creative techniques, and business mindset
Always prioritize safety and hygiene, rehearse techniques like timers and remotes before performing riskier methods, and approach content creation with a business mindset to scale responsibly.
Practical next steps: try safe No Hands variations, set up a FeetFinder profile, and plan a content calendar
Start by practicing low-risk techniques (timers, voice commands), secure your device on a tripod, create a FeetFinder profile with clear listings, and sketch a simple content calendar to maintain consistency.
Ethical and legal reminders for operating responsibly as a foot content creator
Operate within platform rules, verify age and consent for any collaborators, respect privacy and boundaries, and comply with local laws regarding online sales, adult content, and taxation.
Encouragement to experiment, track results, and grow sustainably
Experiment with styles and techniques, track which shots and captions convert, and reinvest earnings into better gear or promotion. Sustainable growth comes from consistent quality and evolving your offerings.
Resources and tools to explore further: FeetFinder, camera apps, lighting guides, and creator communities
Explore platform features on FeetFinder, experiment with camera and editing apps you prefer, learn basic lighting techniques, and engage with creator communities to share tips and feedback. Keep learning and refining your craft to build a resilient and creative business.

Leave a Comment