Nail Polish Tips to Enhance Feet Pics Sales on FeetFinder
Make your feet pics stand out with simple nail polish techniques and thoughtful styling that buyers love. You’ll get practical tips on prepping your feet, choosing colors, arranging lighting and angles, and using props and light editing to make each shot pop.
Treat this as a real business by learning how to set up accounts, brand your content, plan consistent posts, follow platform rules, and set clear customer boundaries. These steps will help you turn steady effort into a scalable, realistic side hustle on FeetFinder and similar platforms.

This image is property of i.ytimg.com.
Prepping Your Feet for Photos
You want your feet to look camera-ready and professional, so prepping is essential. A consistent routine improves skin texture, polish adhesion, and overall presentation, which helps your photos appeal to buyers and builds trust in your content.
Foot hygiene basics: washing and sanitizing before a shoot
Start by thoroughly washing your feet with warm water and a gentle cleanser to remove dirt and oils. Follow with a quick sanitizing spray or wipe on the soles and between toes so your feet look fresh and hygienic in close-up shots.
Exfoliation and callus care for smooth skin
Exfoliate regularly with a foot scrub or pumice to remove dead skin and reduce calluses. Focus on heels and balls of the feet, then rinse and pat dry—smooth skin photographs better and helps polish appear more even.
Moisturizing routines and timing before photos
Moisturize daily with a non-greasy foot cream, but time it so your skin isn’t shiny during the shoot: apply the night before or several hours prior and blot any excess oil right before photographing.
Cuticle care, nail trimming, and shaping tips
Push back cuticles gently after a warm soak, trim nails straight across, and file to a tidy shape that complements your toes. Clean, even cuticles and consistent nail lengths read well on camera and make polish application easier.
Removing old polish and preventing staining
Remove old polish with an acetone or non-acetone remover depending on your nail health, and buff stains lightly. If your nails are stained, use a whitening nail buffer or lemon soak to lift discoloration before polishing.
At-home spa treatments that elevate appearance
Occasional at-home treatments—like a foot mask, paraffin bath, or salt soak—can hydrate and soften skin, improving texture for photos. Keep treatments simple and avoid anything that causes redness or irritation before a shoot.
Scheduling shoots after professional pedicures
If you get a professional pedicure, schedule shoots 24–48 hours afterwards to let polish fully set and any salon-related redness subside. A fresh professional pedicure can be a great selling point when timed right.
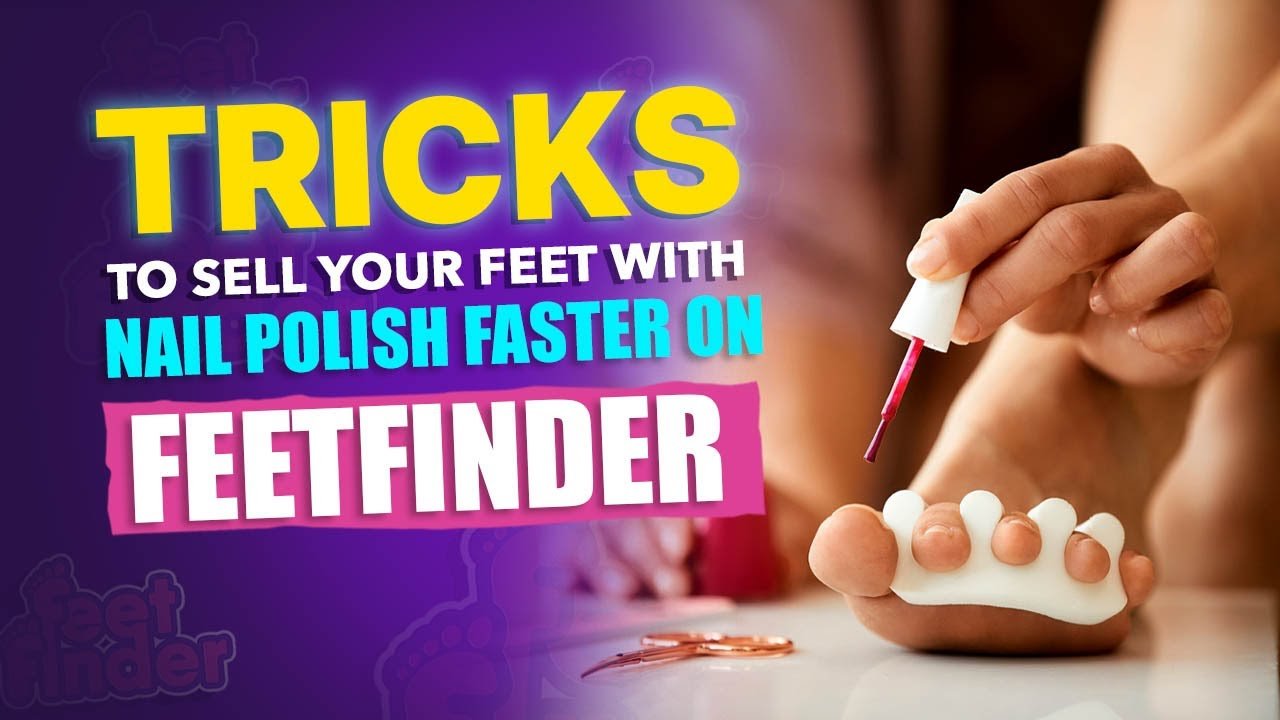
Nail Polish Application Basics
How you apply polish affects durability and finish, so proper technique matters. Clean, thin layers and the right products keep your color looking fresh across multiple shots and help you avoid redoing sets mid-session.
Importance of a clean base coat for longevity
Use a clean base coat to protect your nails, prevent staining, and give polish something to adhere to. A good base increases chip resistance and keeps your pedicures looking new longer, which is key for resale images.
Applying thin, even coats for a smooth finish
Apply two to three thin coats rather than one thick one; thin layers dry faster and level better. Work in thin, steady strokes from the cuticle to the tip for a smooth, streak-free finish that photographs evenly.
Drying time strategies and quick-dry products
Allow adequate drying between coats and use quick-dry drops or sprays if you’re on a tight schedule. Patience pays off—fully dried polish resists smudges and shows true color when photographed.
Choosing top coats: glossy, matte, and gel-like finishes
Select a top coat that matches the look you want: glossy for shine, matte for a sophisticated flat finish, or gel-like for thick lacquer without UV lamps. Each finish changes how light interacts with your toes in photos.
Curing techniques for gel polish versus regular polish
If you use gel polish, cure each layer under the appropriate lamp for the recommended time to avoid tackiness. For regular polish, ensure full air-dry time and consider a fast-evaporating top coat for a durable glossy result.
Tools that make application easier and neater
Keep a steady base, toe separators, angled brushes, and clean-up brushes with acetone handy to tidy edges. A small palette for polish application and a magnifying mirror can up your precision for camera-ready nails.
Preventing common polish mistakes and fix tips
To avoid floods, streaks, and cuticle polish, wipe excess from the brush and use a light hand. Fix chips with a thin dab of color and a top coat; for smudges, gently remove and reapply the affected nail instead of trying to fix it on the fly.
Choosing Colors That Sell
Color choices influence buyer preferences and repeat sales. You’ll want a balance of reliable best-sellers and occasional trends so your content appeals to a broad audience while staying fresh.
Best-selling color families for feet photos
Classic reds, soft pinks, neutrals, and nudes consistently sell well because they’re versatile and flattering. Black and deep burgundy also perform strongly for dramatic or moody photo sets.
Seasonal color strategies and trend awareness
Match colors to seasons: pastels and corals in spring/summer, richer tones in fall/winter. Keep an eye on trend cycles—seasonal palettes and fashion influences can bring spikes in demand.
Selecting hues that flatter different skin tones
Choose shades that complement your skin tone: warm tones suit corals and warm nudes, while cool tones glow with berry and icy neutrals. Test swatches in natural light to see how they read on camera.
Color psychology and buyer perception
Color influences mood: red conveys confidence and sensuality, pinks feel soft and approachable, while neutrals suggest elegance. Think about the vibe you want buyers to feel when selecting polish.
Coordinating polish with backgrounds and props
Coordinate polish colors with your background and props to create cohesive images. Contrasting hues can make nails pop, while complementary palettes create a soothing, curated look that’s pleasing to buyers.
Balancing classic staples with trendy experiments
Keep a core set of staple colors for consistent sales, and rotate in experimental shades or techniques for special shoots. Trendy experiments can attract new buyers without alienating your regular audience.
Nail Art and Accents to Increase Appeal
Thoughtful nail art can elevate your photos and justify premium pricing, but it should read clearly on camera and remain tasteful and well-executed.
Simple designs that read well in photos
Thin stripes, small dots, single accent nails, and minimal negative-space designs translate well in photos. Keep designs bold enough to be seen at various crop sizes and avoid overly intricate details that get lost.
Using rhinestones, studs, and tiny embellishments safely
Use small embellishments sparingly and secure them with a strong top coat or adhesive. Ensure they’re flat enough to avoid discomfort in barefoot shots and check that they stay put during movement for consistency across images.
Decals, stickers, and press-on accents for variety
Decals and press-ons let you switch styles quickly without a full redo. Choose high-quality pieces and blend edges with a top coat so they photograph naturally and won’t peel during the session.
Ombre, gradient, and French tip techniques
Ombre and gradients add visual depth, while modern French tips (colored or negative-space variants) remain timeless. Use sponges or airbrushing tools for smooth blends that look great in close-up photos.
Applying glitter and ensuring it photographs cleanly
Apply glitter in thin, controlled layers and seal with a glossy top coat to keep shine consistent. Use fine glitter for a luxe shimmer that catches light without looking chunky or messy on camera.
When minimalist styling outperforms ornate designs
Minimalism often reads better in thumbnails and mobile previews because it’s clear and recognizable. If you’re uncertain, start with a simple, well-executed look before moving to ornate styles for premium shoots.
Maintenance Between Shoots
Keeping your feet and polish fresh between shoots saves time and helps you maintain a consistent catalog. Small daily rituals prevent frequent full redos and preserve image quality over time.
Quick touch-up routines to refresh polish
Use a small brush and matching polish to touch up chips, then apply top coat to blend repairs. For quick shine restoration, buff lightly and reapply a thin top coat—this keeps images tidy without a full repaint.
Extending manicure life with protective products
Use cuticle oil, strengthening base coats, and a durable top coat to extend wear. Avoid prolonged soaking and rough surfaces; treating your feet gently between shoots reduces peeling and chipping.
Fixing chips and texture issues for resale-ready images
For chips, sand the edge lightly, apply color, and reseal. For texture problems like bubbling, remove the polish and redo that nail or apply a smoothing top coat if the issue is minor and camera-friendly.
Scheduling regular foot care and pedicures
Create a maintenance calendar that aligns with your shoot frequency—weekly check-ins and monthly professional pedicures can keep your feet consistently attractive for buyers and reduce emergency fixes.
Emergency kits and products to keep on-hand
Keep an emergency kit with polish, base/top coats, acetone, cotton swabs, nail files, cuticle oil, and small glue for embellishments. A compact kit helps you handle last-minute fixes before a shoot.
Tracking what worked across shoots for consistency
Keep a simple log of colors, designs, lighting setups, and buyer feedback so you can replicate successful sets. Consistency builds a reliable brand and helps you scale your content more predictably.
Lighting, Angles, and Composition for Feet Pics
Technical choices make the difference between a casual snap and a sale-ready image. You’ll want lighting and composition that flatter your toes and showcase polish color accurately.
Natural light techniques and ideal shooting times
Use soft natural light near a north-facing window or shoot during golden hour for warm, flattering tones. Indirect daylight reduces harsh shadows and reveals polish color more faithfully than mixed artificial light.
Using soft artificial lighting and diffusers
If natural light isn’t available, use softbox lights or ring lights with diffusers to mimic gentle daylight. Keep lights slightly above and at an angle to create soft highlights on polish without glare.
Flattering angles for toes, arches, and soles
Experiment with angles: a three-quarter view highlights arches, a close-on-toes shot emphasizes polish, and a slight overhead shows nail shape. Rotate your ankle and flex toes to find flattering lines.
Camera distance, focal length, and avoiding distortion
Use a mid-range focal length (for phone cameras, avoid extreme close-ups) and step back slightly for clearer proportions. Too-close shots can distort toe shape; maintain consistent distance for series shots.
Choosing neutral and complementary backgrounds
Neutral backgrounds like soft fabrics, pale wood, or muted tiles keep focus on your feet. Complementary backgrounds can enhance polish color, but avoid busy patterns that distract from the nails.
Composition rules that highlight polish and shape
Apply composition rules like the rule of thirds and leading lines to draw the eye to your toes. Use negative space purposefully and frame shots to emphasize nail color, shape, and any accessories.
Props, Accessories, and Styling
Props and accessories add context and storytelling to your images, increasing buyer interest. Use them to enhance mood without stealing attention from your feet and polish.
Shoes, sandals, and barefoot contexts to vary content
Include a mix of barefoot, sandal, and shoe shots to appeal to different buyer preferences. Open-toe sandals showcase polish, while barefoot shots emphasize natural shape and skin texture.
Socks, stockings, and legwear styling tips
Sheer stockings, patterned socks, or fishnets can create themed content and highlight polish through contrast. Make sure fibers are clean and well-fitted so they look intentional and not distracting.
Anklets, toe rings, and tasteful jewelry choices
Subtle anklets or toe rings can add personality and draw attention to your feet. Choose pieces that complement rather than overpower your polish and make sure they’re secure for multiple shot angles.
Textured backgrounds, fabrics, and surfaces
Textures like knitted throws, sandy beaches, or marble tiles add depth and context. Match textures to your theme—soft fabrics for cozy shoots, sleek surfaces for modern looks—to enhance the overall aesthetic.
Seasonal and thematic props to create moods
Use seasonal props (flowers, leaves, holiday items) sparingly to tell a story and make images timely. Themed shoots can command premium pricing if executed cohesively with color and styling.
Color coordination between props and polish
Coordinate prop colors with your polish to create harmonious images. Either match tones for a cohesive look or use contrasting accents to make your polish pop, depending on the mood you want to convey.
Photo Editing and Post-Processing
Editing helps your images reflect what buyers saw and expect, but subtlety is key. Use post-processing to correct and enhance without misrepresenting your feet or polish.
Basic edits that enhance polish color and clarity
Start with exposure, contrast, and clarity adjustments to make polish colors true-to-life. Small tweaks can improve image quality and make polish appear more vibrant in thumbnails and galleries.
Color correction and white balance for accurate tones
Adjust white balance to remove color casts so polish and skin tones look natural. Accurate color representation is important for buyer trust and reduces returns or complaints.
Cropping, framing, and creating compelling thumbnails
Crop to emphasize the focal point—your toes—and create clean thumbnails that read well at small sizes. Tight, well-composed crops increase click-through rates and showcase polish detail.
Skin smoothing while preserving texture realism
Use gentle skin smoothing to reduce small imperfections, but preserve natural texture so your images remain believable. Over-smoothing can look artificial and harm buyer confidence.
Sharpening nail details and controlling noise
Apply localized sharpening to nails and polish to enhance detail, and use noise reduction on backgrounds for a polished look. Balance sharpening to avoid introducing halos or artifacts.
Guidelines to avoid over-editing that looks fake
Avoid extreme filters, exaggerated colors, and heavy airbrushing. Keep edits realistic so buyers receive what they expect—authenticity sells better and builds repeat customers.
Video and Motion Content Tips
Video lets buyers see polish shine and foot movement, which can boost engagement and sales. Short, polished clips often perform better than long ones, so keep them purposeful.
Short clip ideas that showcase polish and movement
Create short clips of toes wiggling, soles flexing, or polish catching light. Quick transitions between angles can show color shifts and texture, making your content more dynamic.
Camera motions that highlight shine and texture
Slow pans, gentle tilts, and subtle zooms highlight gloss and texture. Keep motion smooth and purposeful to avoid distracting jerks that reduce perceived professionalism.
Lighting tweaks for capturing glitter and gloss
Angle light to create sparkles and highlights on glitter or glossy top coats. A backlight or side light can enhance shimmer and make polish look three-dimensional on video.
Stabilization and framing for mobile video
Use a tripod, gimbal, or phone stabilizer to keep shots steady. Frame consistently and keep a comfortable distance so viewers can appreciate detail without distortion.
Incorporating sound, captions, and calls-to-action
Add gentle ambient sound or music, subtitles, and a clear call-to-action to guide viewers—like where to view more content. Ensure captions are concise and match your brand voice.
When to use video vs stills to increase sales
Use stills for thumbnails and high-detail previews, and video to demonstrate movement, shine, and fit. Combining both gives buyers the confidence to purchase and explore your content further.
Conclusion
You’ve learned practical steps to make nail polish a compelling selling point for your feet pics. Consistency, care, and thoughtful presentation will help you turn polish into a brand asset that supports sales and repeat business.
Key takeaways to make nail polish a selling point for feet pics
Focus on prepping, clean application, flattering color choices, good lighting, and minimal editing. Combine staples with occasional trends, and use simple styling to keep your catalog professional and appealing.
Actionable steps to implement immediately
Tonight: exfoliate and moisturize. Tomorrow: choose two staple polishes and one trendy shade. Before your next shoot: gather tools, set up soft lighting, and practice two flattering angles for consistent images.
Resources and tools to help you improve faster
Use quality base/top coats, a softbox or ring light, toe separators, and a basic editing app with white balance and cropping tools. A small emergency kit and a shoot log will speed up your workflow and consistency.
Final reminders about safety, boundaries, and professionalism
Protect your privacy, set clear boundaries with buyers, and follow platform rules where you sell your content. Maintain professional communication, prioritize consent, and always avoid any situation that makes you uncomfortable.

Leave a Comment